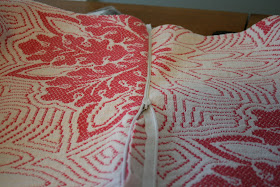
Pillows are about the easiest thing you can make, even with a fancy invisible zipper.
I got this fabric, which began life in the 1950's as a bedspread, from an antiques mall in Macon that often has great-looking, brightly-colored vintage linens at very reasonable prices. I think I got this full-size coverlet and an orange king-sized coverlet (now a double-layer blanket) for $25. Repurposing one-off or antique items is a great way to get a colorful, eclectic look without having to buy everything at Anthropologie - or admitting you've done so.
Materials:
- Roughly 1 yard of fabric, depending on how big you want your pillow
- A corresponding pillow insert
- An invisible zipper, sized 2" longer than the length of your pillow
- One 3-yard package of fusible interfacing
- An iron
- A sewing machine with an invisible zipper foot, a narrow foot, or a zipper foot
Cut out a square of card stock or board the size of your finished pillow - 1" smaller than your insert. Center this square on your pattern, so that a medallion or pattern on the fabric will appear in the center of the pillow. Trace the square onto the wrong side of your fabric, and cut it out, leaving a 1" seam allowance.
Iron on fusible interfacing to the back of the fabric, to stiffen it and make it more durable. Skip this step if your fabric is heavy-weight.

Next, you're going to install the invisible zipper. This is the only tricky part. I did it backwards the first time around:

If you have an invisible zipper foot, and know how to use it, go for it. I'm going to structure these instructions as if you don't - because I didn't - and you have to make do - which I did.
Open the zipper completely. Turn the zipper right-side-down, and iron on low heat. You want the teeth of the zipper to be as level as possible with the back of the zipper fabric, but don't melt the nylon teeth. The ridge of the teeth should be pushed to the right-side of the zipper.
At the top of your fabric (based on the orientation of the fabric's pattern), draw a line on the right side of the fabric that corresponds to the one you drew on the wrong side of the fabric.
Attach the foot to your sewing machine. I used a zipper foot with an adjustable reach.

If you're using a zipper foot, use the machine's handwheel to lower your needle into the fabric once - the needle should be flush with the edge of the foot, so that it enters inside the indent in the foot. This will put your needle flush against the teeth of the zipper. I started out with the needle on the left side of the foot.

Position the zipper so that the zipper lays wrong-side-up on the right-side of the fabric, with the teeth facing away from the edge, as so:

Following the line you drew on the fabric, baste the zipper on, keeping the needle as close to the zipper teeth as possible. It helps if you use your left hand to roll the zipper teeth out, to the left; that way you can sew almost flush to the zipper. Backstitch at the end to secure.
Repeat this process with the other piece of fabric and the other side of the zipper. I simply moved the adjustable needle to the right side of the foot, so that I could do this side exactly the same way as the first.
When you're done, turn it over, and the zipper should look like this:

Invisible, indeed!
I went back and sewed the zipper tape along the top of the pillow, to give the pillow a little durability. This step is up to you. I like how it looks, but it makes the zipper less invisible:

Flip the pillow inside-out, so that the right sides of the fabric are against each other. Bast around the other three sides of the pillow, where you marked before cutting. Before closing the three sides, unzip the first side slightly, so you can pull it back out.

Stuff your pillow insert into the case. Is it the right size? I started by using the same dimension as my insert, but I felt it was too loose, and I went back and basted inside the first rows of stitching. That's why I've had you subtract an inch.
Once you're satisfied with how the pillow will look, snip in the fabric at the corners so it won't bunch weirdly there.

Flip it back right-side-out. Done!

Poke!
ReplyDeleteThese are gorgeous! And thanks so much for the instructions. I've been trying to learn how to make a really 'finished' looking pillow and you've really helped me out! Btw, I just found your blog, stumbled onto it today actually, and I LOVE it! I've been reading off and on all day today just devouring all your amazing ideas. Keep it up! :)
ReplyDelete